Bread enthusiasts assemble! Ready to embark on the delicious journey of making your very own sourdough bread? There’s something incredibly rewarding about baking a loaf from scratch. Plus, the taste is unbeatable! Let’s dive into the step-by-step process, starting with the all-important sourdough starter.
Step 1: Making the Sourdough Starter

Ingredients:
- Whole wheat flour (can use all-purpose flour after the first week)
- Water (filtered or non-chlorinated is best)
Day 1:
- In a clean jar, mix 1/2 cup of whole wheat flour and 1/2 cup of water.
- Stir until combined, cover with a cloth, and let it sit at room temperature for 24 hours.
Day 2:
- You might see bubbles! This means fermentation has started.
- Discard half of the starter (about 1/2 cup).
- Add 1/2 cup of all-purpose flour and 1/2 cup of water to the remaining starter. Stir well, cover, and let sit for another 24 hours.
Days 3-7:
- Continue the process of discarding half and feeding the remaining starter with 1/2 cup of flour and 1/2 cup of water every 24 hours.
- By day 7, your starter should be bubbly and have a tangy smell. Congrats, you’ve made a sourdough starter!
Pssst… Or you can also cheat on those above steps and get this lovely dehydrated sourdough starter from our friends over at Homestead on the Rise.
Step 2: Baking Your Sourdough Loaf
Ingredients:
- 1 cup active sourdough starter
- 1 1/2 cups water
- 4 cups bread flour
- 2 teaspoons salt
Tools You’ll Need:
- Large mixing bowl
- Kitchen scale (for accuracy)
- Dough scraper
- Dutch oven or a baking stone
- Banneton (proofing basket) or a bowl lined with a cloth
- Razor blade or sharp knife (for scoring)
Mixing the Dough:
- In a large mixing bowl, combine 1 cup of your active sourdough starter with 1 1/2 cups of water. Mix until the starter is dissolved.
- Add 4 cups of bread flour and 2 teaspoons of salt. Mix until a shaggy dough forms. You can use a wooden spoon or your hands.
- Cover the bowl with a damp cloth and let it rest for 30 minutes.
Stretch and Fold:
- After the rest, perform the first “stretch and fold.” Grab a corner of the dough, stretch it up, and fold it over itself. Do this 4 times, rotating the bowl each time.
- Repeat the stretch and fold process every 30 minutes for the next 2 hours. This helps build the dough’s strength.
Bulk Fermentation:
- After the last stretch and fold, cover the dough and let it rise at room temperature for 3-4 hours or until it has doubled in size.
Shaping:
- Turn the dough onto a lightly floured surface.
- Shape it into a round or oval loaf, depending on your proofing basket and baking vessel.
- Place the shaped dough into a floured banneton or a bowl lined with a floured cloth. Cover and let it rise for another 2-3 hours at room temperature, or place it in the fridge for an overnight proof.
Baking:
- Preheat your oven to 450°F (230°C). If using a Dutch oven, place it in the oven to preheat as well.
- Once preheated, carefully transfer your dough onto parchment paper.
- Score the top with a razor blade or sharp knife.
- Transfer the dough (with the parchment paper) into the preheated Dutch oven. Cover with the lid and bake for 20 minutes.
- Remove the lid and bake for another 20-25 minutes until the crust is golden brown and the loaf sounds hollow when tapped.
- Let the bread cool completely on a wire rack before slicing. This is the hardest part, but it’s crucial for the texture.

Best Tools for Baking Sourdough
- Kitchen Scale: Accuracy in measurements can make or break your sourdough.
- Dutch Oven: Ensures a great crust by trapping steam during the initial bake.
- Banneton: Helps the dough keep its shape and adds beautiful patterns to the crust.
- Dough Scraper: Makes handling sticky dough much easier.
- Razor Blade/Sharp Knife: For scoring the dough, allowing it to expand properly in the oven.

And there you have it – your very own homemade sourdough bread! Sourdough baking is an art; every loaf teaches you something new. Don’t worry if it’s not perfect the first time; keep practicing, and you’ll soon be baking like a pro. Enjoy the process, and happy baking!
Looking for a non-sourdough option for a simple bread? Check out the Homemade Bread: Step-by-Step Guide to Baking Your Own Fresh Loaves post.
This blog contains affiliate links, which means I may earn a small commission if you make a purchase through these links. This comes at no additional cost to you and helps support the ongoing content creation on this site. I only recommend products and services that I personally use and believe in. Thank you for your support!


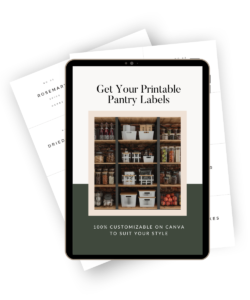
 Don’t forget to grab your Free Pantry Labels! Fully editable on Canva to suit your personal design style!
0 Comments