There’s something undeniably special about baking your own bread. The aroma that fills your home, the joy of slicing into a warm, freshly baked loaf, and the satisfaction of creating a staple food with your own hands—it’s an experience like no other. While bread baking may seem daunting, with a little patience and a few simple ingredients, anyone can learn to make their own delicious, wholesome bread at home. Let’s dive into this step-by-step guide and unlock the secrets to baking the perfect loaf.

Why Bake Your Own Bread?
Before we dive in, let’s talk about why homemade bread is worth the effort:
- Healthier Ingredients: You control what goes into your bread—no preservatives or artificial additives.
- Cost-Effective: Homemade bread is often more affordable than buying high-quality loaves at the store.
- Customizable: Adjust flavours, textures, and ingredients to suit your preferences.
- Joyful Process: Baking is a hands-on, therapeutic experience that’s as enjoyable as the end result.
Ingredients You’ll Need
For a basic loaf of bread, all you need are four simple ingredients:
- Flour: All-purpose or bread flour works best, but feel free to experiment with whole wheat or spelt for different textures.
- Water: The key to the perfect dough is the right amount of hydration.
- Salt: Adds flavor and balances the dough.
- Yeast: This is what makes your bread rise, creating that light, airy texture we all love.
Optional additions for extra flavor include honey, sugar, olive oil, herbs, seeds, or spices.
Step 1: Mixing the Dough
- Measure the Ingredients: Use a digital scale if you have one for accuracy, but if not, measuring cups work just fine.
- 3 cups flour (about 375g)
- 1 teaspoon salt
- 1 cup warm water (around 110°F)
- 1 teaspoon active dry yeast (or 2 teaspoons instant yeast)
- Activate the Yeast: If you’re using active dry yeast, dissolve it in warm water with a pinch of sugar. Let it sit for 5-10 minutes until it gets foamy. If you’re using instant yeast, you can skip this step and mix it straight into the flour.
- Combine Ingredients: In a large mixing bowl, add the flour and salt. Pour in the water and activated yeast. Mix until everything comes together in a shaggy dough.
- Knead the Dough: Turn the dough onto a floured surface and knead for about 8-10 minutes. You’re looking for a smooth, elastic texture. (Tip: If the dough is sticky, sprinkle a little more flour as you go.)
Step 2: The First Rise
After kneading, it’s time to let the dough rest and rise. This first rise allows the yeast to work its magic, making your dough double in size.
- Shape the Dough into a Ball: Place the kneaded dough into a lightly greased bowl and cover it with a damp cloth or plastic wrap.
- Let It Rise: Leave the dough in a warm, draft-free spot for about 1-2 hours, or until it has doubled in size. (Tip: If your home is chilly, place the dough in an oven that’s turned off with just the oven light on for a cozy, slightly warm environment.)
Step 3: Shaping the Loaf
Once the dough has doubled, it’s ready to be shaped!
- Punch Down the Dough: Gently press down on the dough to release any air bubbles.
- Shape the Dough: Place the dough onto a lightly floured surface, gently flatten it, then shape it into a loaf by folding the edges toward the center. Place it seam-side down in a greased loaf pan or on a baking sheet lined with parchment.
- Second Rise: Cover the dough again and let it rise for about 30-45 minutes until it has puffed up. This step is crucial for achieving a light, airy crumb.
Step 4: Baking the Bread
Finally, it’s time to bake!
- Preheat Your Oven: Heat your oven to 375°F (190°C). If you’re aiming for a crispy crust, place a baking dish filled with water on the lower rack of the oven—this creates steam and helps develop that bakery-style crust.
- Bake the Bread: Place your loaf in the oven and bake for about 30-35 minutes, or until the crust is golden brown. If you’re unsure if it’s done, tap the bottom of the loaf—it should sound hollow.
- Cool on a Wire Rack: Allow the bread to cool for at least 15-20 minutes before slicing. (This is the hardest part, but it’s worth the wait to avoid a gummy texture!)

Tips and Tricks for Bread Success
- Experiment with Flavors: Add herbs, garlic, or cheese to your dough for extra flavor.
- Use a Bread Machine or Stand Mixer: If you want to make the process easier, use a stand mixer with a dough hook or a bread machine on the dough setting.
- Practice Makes Perfect: Baking bread is as much an art as it is a science, so don’t be discouraged if it’s not perfect the first time!
Variations to Try
Once you’ve mastered the basics, the possibilities are endless:
- Whole Wheat Bread: Substitute up to 50% whole wheat flour for a denser, more nutritious loaf.
- Sourdough: Start a sourdough starter for a tangy, naturally leavened loaf.
- No-Knead Bread: For a low-effort option, try a no-knead recipe that requires only time and patience!
Baking homemade bread is not only a delicious journey but also a fulfilling way to reconnect with one of life’s simplest pleasures. Each loaf is a testament to your time, effort, and love for quality food. So whether you’re baking for yourself or your family, this guide is a great starting point on your path to mastering the art of bread-making.
Roll up those sleeves, grab some flour, and let’s get baking!


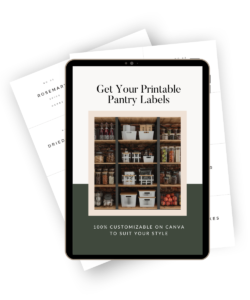
 Don’t forget to grab your Free Pantry Labels! Fully editable on Canva to suit your personal design style!
0 Comments